")
Alright, so you wanna know how I get my mineral foundation on? It’s not rocket science, but I’ve definitely figured out a few things over the years that make it work for me. Lemme walk you through how I do it, step by step. No fancy MUA tricks here, just what I’ve found actually works day in, day out.
First Up: Getting Your Face Ready
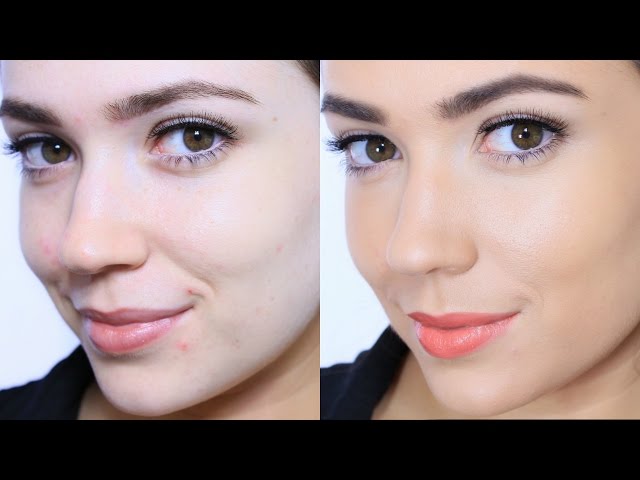
Honestly, this is probably the most important bit. If your skin ain’t prepped, forget about it. It’s just gonna look weird and patchy.
So, first thing I do is wash my face. Just my usual cleanser, nothing special. Then, and this is key, I moisturize. And I mean, really let that moisturizer sink in. I give it a good five, sometimes ten minutes. If my skin is still feeling a bit tacky, the foundation can grab on all wrong. So, patience here, seriously. Sometimes I’ll even use a primer if I’m feeling fancy or know it’s gonna be a long day, but usually, just well-moisturized skin is my go-to base.
Getting Your Tools and the Powder Sorted
Okay, face is feeling good. Now for the tools. My weapon of choice? A good, dense kabuki brush. Some folks like a flat top brush, and that’s cool too, but I just find the kabuki gives me that nice, buffed finish I’m after. Make sure your brush is clean, by the way. A dirty brush is just asking for trouble.
Then, the foundation itself. I don’t just dip my brush straight into the main pot. No way. Too much product, too much mess. What I do is tap a little bit of the powder into the lid of the container. You really don’t need a lot to start with. Less is more, especially with this stuff. You can always add more, but taking it away is a nightmare.
The Main Event: Putting It On Your Face
This is where the “swirl, tap, buff” thing comes in. You’ve probably heard it, but it actually works.
So, I take my kabuki brush and swirl it around in the lid to pick up that powder I just tapped out. Get it nicely coated, but don’t go crazy.
Then, and this is super important, I tap the brush – either on the side of the lid or just holding it upright and tapping the base on my counter. You’ll see a bit of excess powder fall off. That’s good. You want to get rid of that loose stuff so you don’t end up looking like you’ve been dusted with flour.
Now for the buffing. I start usually around the center of my face – nose, cheeks, chin – and work my way out. I use gentle, circular motions. Buff, buff, buff. Don’t press too hard. You’re not trying to scrub your skin off. Just light, even circles. I keep buffing until it looks like it’s melted into my skin, not just sitting on top.
Building It Up (If You Need To)
The cool thing about mineral foundation is that you can build up the coverage. If I’ve got a spot that needs a bit more help, or an area that’s a bit red, I’ll just repeat the process – tiny bit more powder in the lid, swirl, tap, and then gently buff a little extra just on that area. I try not to go overboard. The goal is to even things out, not to wear a mask, you know?
Sometimes I’ll even use a smaller, more precise brush for tiny spots if I really want to be careful.
And That’s Pretty Much It
Once I’m happy with the coverage, I usually just let it settle for a few minutes. Mineral foundation often looks even better after it’s had a chance to meld with the natural oils in your skin. Sometimes, if I’m feeling extra, I might spritz on a bit of setting spray, especially if it’s hot out or I need it to last all day and night. But often, I just leave it as is.
So yeah, that’s my routine. It took a bit of practice to get the hang of how much product to use and the right buffing pressure, but now it’s pretty quick. Hope that helps you out if you’re trying to figure this stuff out!
