
Okay, so you guys know I’ve been obsessed with trying out new hair styles lately. Today, I’m gonna walk you through how I styled my hair crimped. It was a bit of a journey, let me tell ya!
First things first, I started with clean, dry hair. Crucial, people! I washed it the night before and just let it air dry. You don’t want any product in there messing with the crimper.
Next up, heat protectant! This is non-negotiable. I sprayed that stuff all over my hair like I was spraying for bugs. Seriously, don’t skip this step unless you want fried hair.
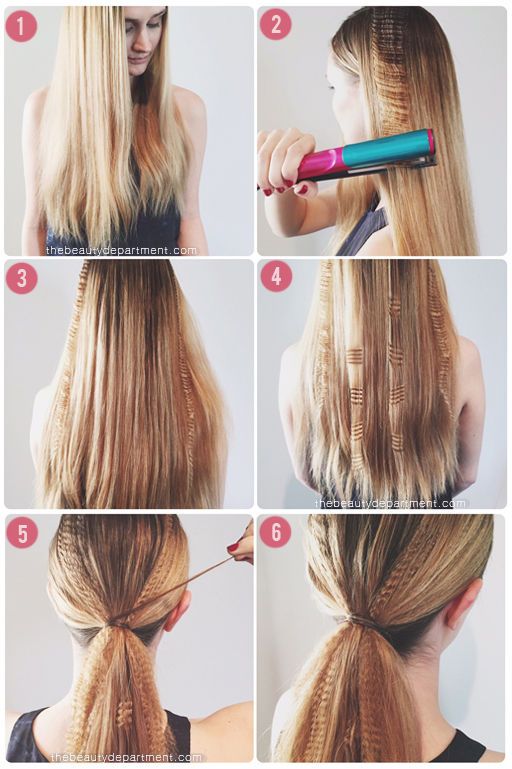
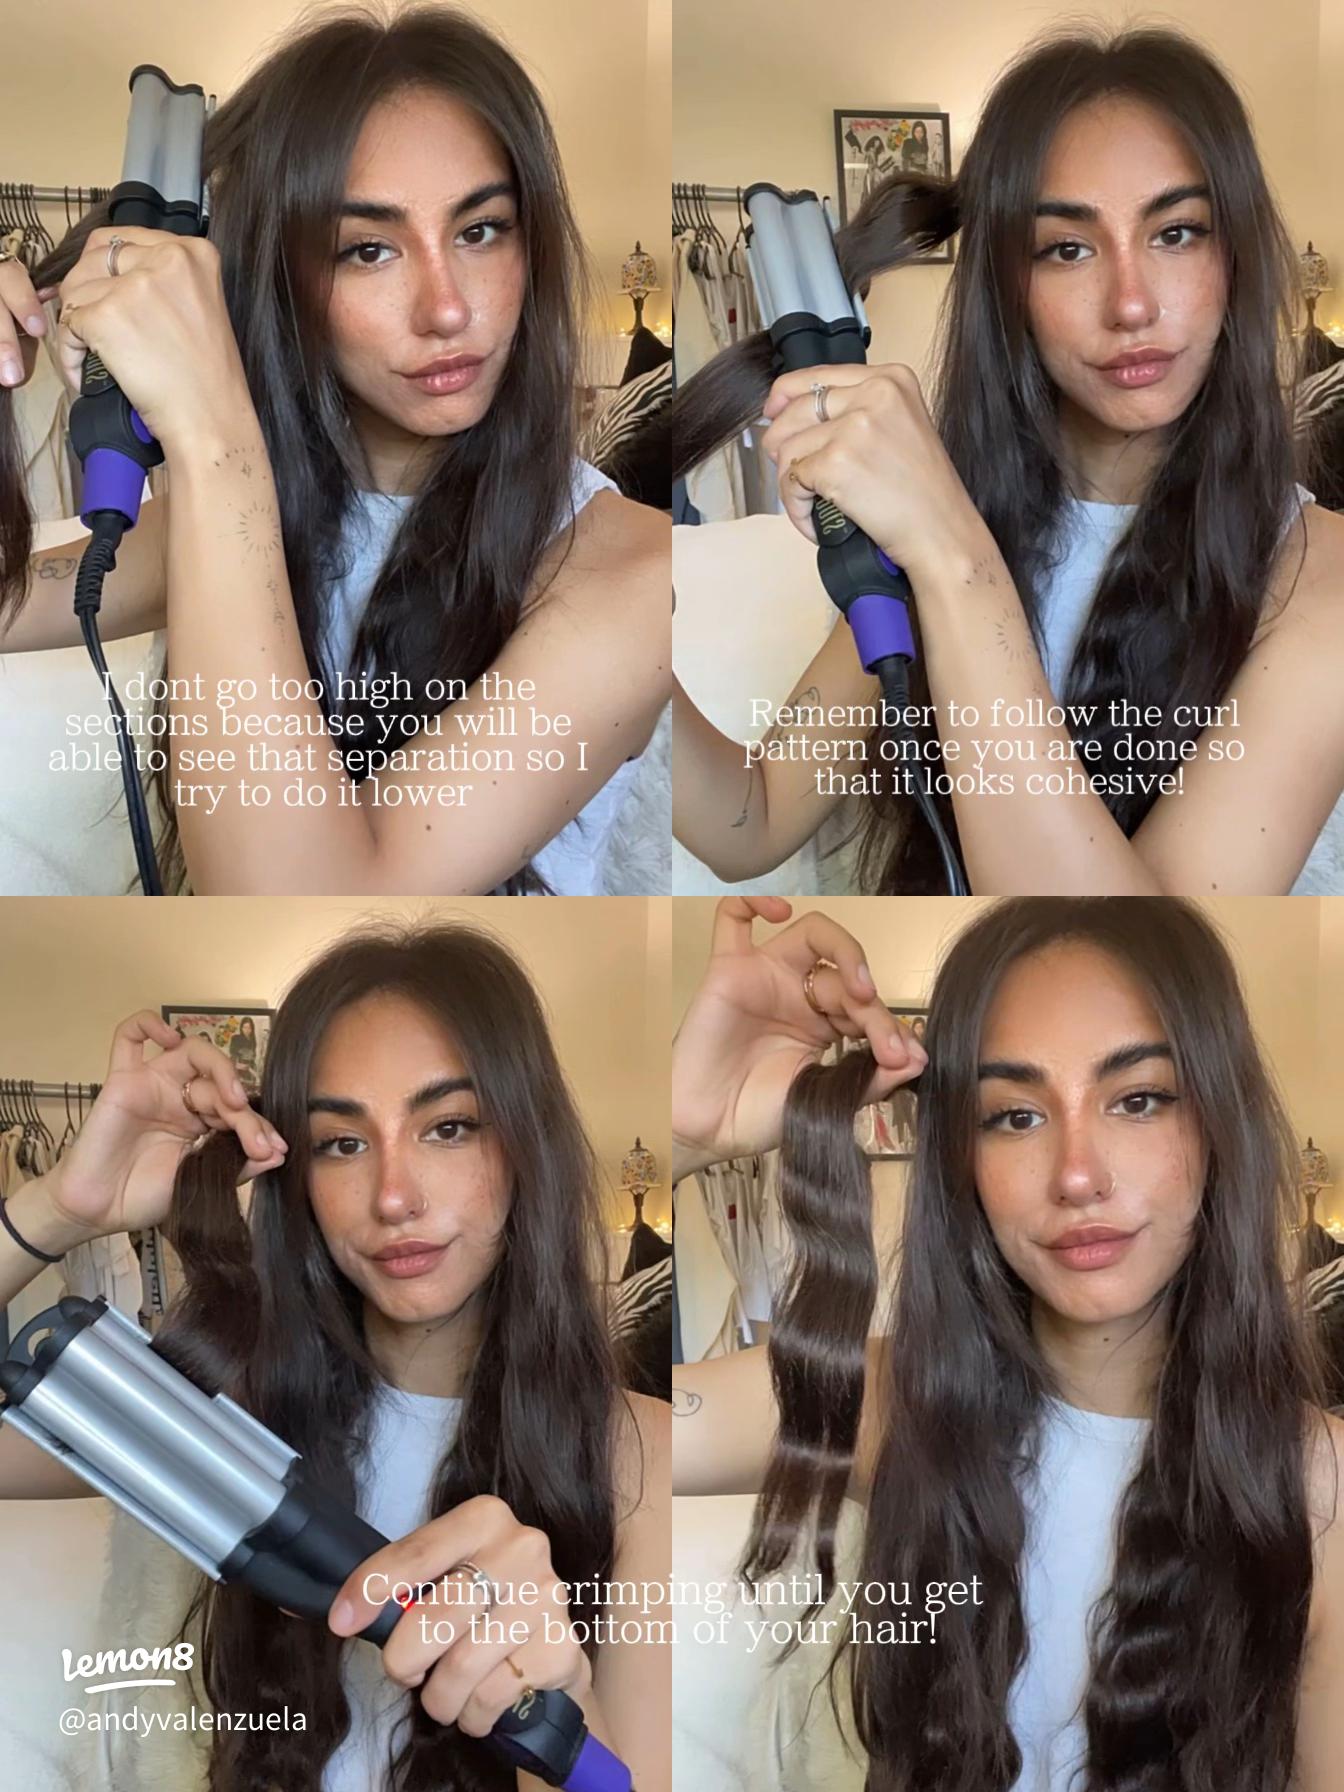
Then came the actual crimping. I sectioned off my hair into about one-inch pieces. Smaller sections give you a tighter crimp, bigger sections, a looser one. I wanted something in the middle, so one inch it was.
I grabbed my crimper – it’s an old one I’ve had for ages, but it still works like a charm. I started near my roots, clamped down, and held it for like, five seconds. Then I moved down the section, overlapping the crimps slightly. This is important so you don’t get any weird straight lines.
Let me tell you, this took FOREVER! I felt like I was crimping for hours. My arms were burning, I was getting hot, but I kept going. Gotta commit, right?
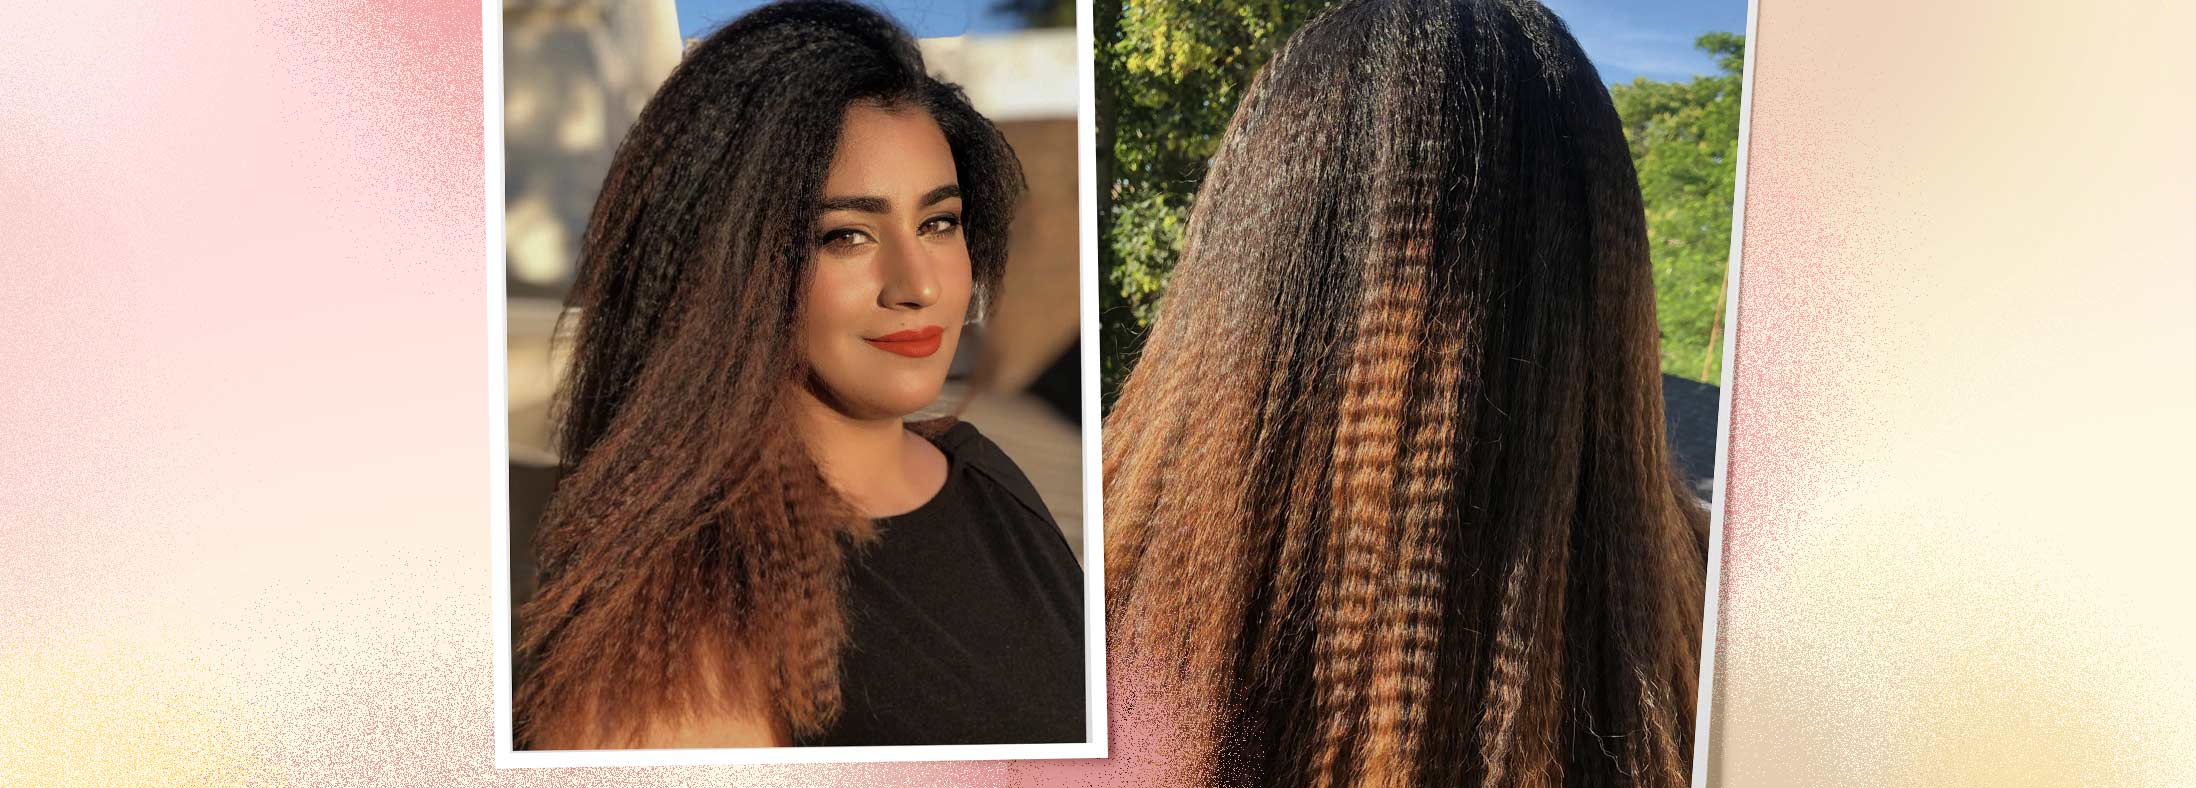
Once I finally finished crimping my whole head, I took a step back and looked in the mirror. Honestly? It looked a little…intense. Like I’d stepped out of a time machine from the 80s. Not exactly the vibe I was going for.
So, I decided to tone it down a bit. I ran my fingers through my hair to loosen the crimps and make them a bit more natural looking. This helped a lot!
Then, I added a little bit of hairspray. Just a light mist to keep everything in place without making it stiff. I hate stiff hair.
Finally, I played around with it a bit more. I tried a half-up, half-down style, which looked pretty cute. I also thought about adding some accessories, like a headband or some clips, but decided to keep it simple.
The Verdict?
Crimped hair is definitely a fun look, but it’s a commitment! It takes time and a lot of arm strength. I’m not sure I’d do it every day, but it’s definitely something I’ll try again for a special occasion.
- Prep is key: Clean hair and heat protectant are a must.
- Sectioning matters: Smaller sections = tighter crimps.
- Don’t overdo it: Loosen the crimps with your fingers if it looks too intense.
- Hairspray lightly: Keep it in place without stiffness.
Hope you guys enjoyed my little crimped hair adventure! Let me know if you try it out, and how it goes!
