
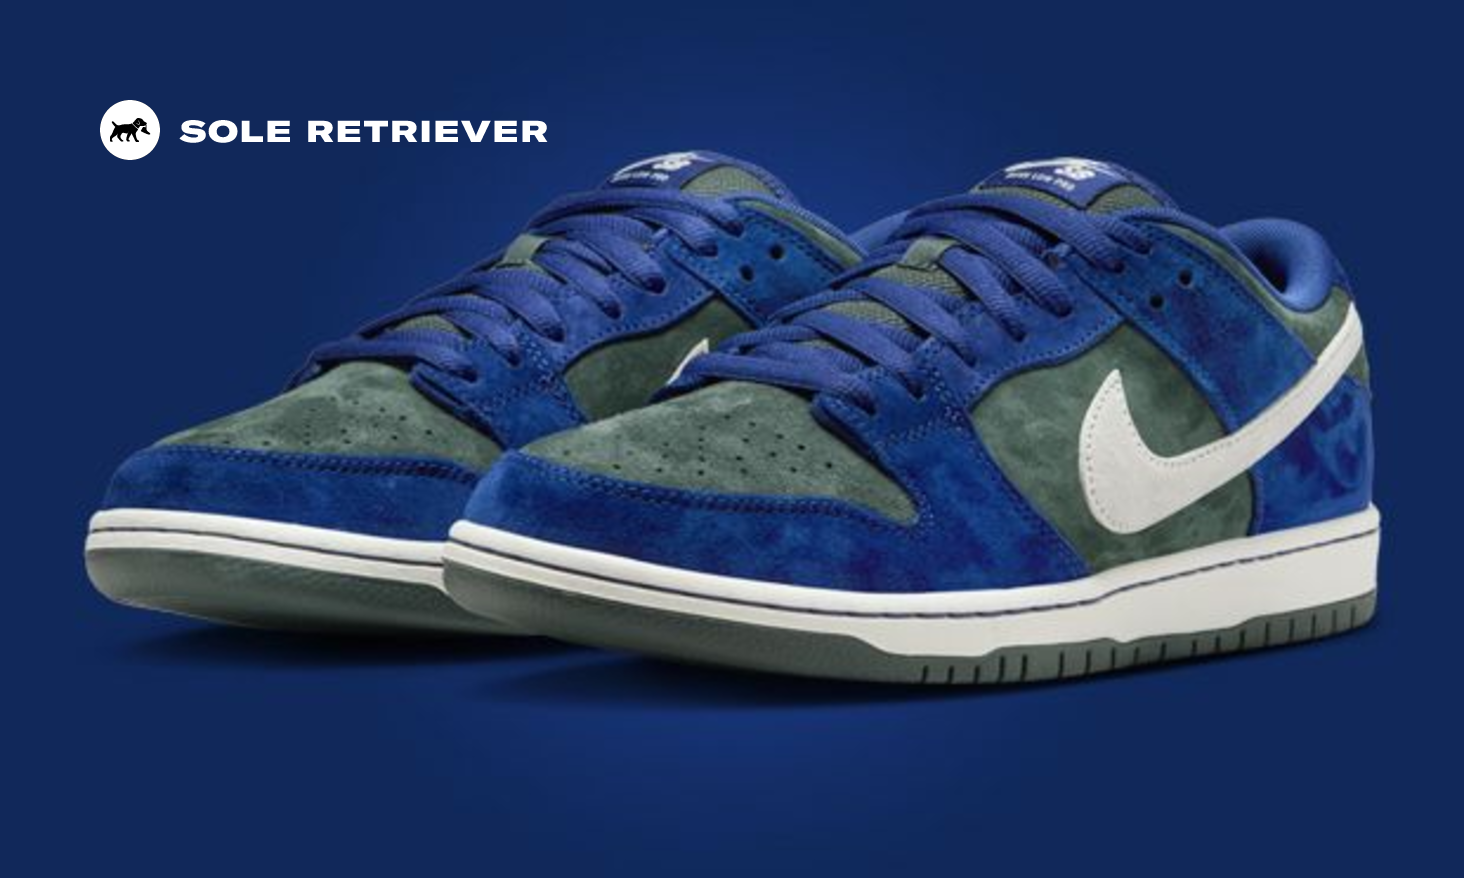
Okay, so I had this idea stuck in my head for ages. I really wanted a pair of Dunks, but not just any pair. I needed them to be blue and green. Like, my kind of blue and green. Couldn’t find exactly what I pictured anywhere, so I thought, heck, I’ll just make ’em myself.

Getting Started
First step, obviously, was getting some Dunks to actually work on. Didn’t want to ruin a super expensive pair right off the bat, you know? So I went hunting for a plain white pair, something simple. Scoured online marketplaces for a bit, found a decent used pair that looked like a good base. They arrived, looked okay, maybe a little beat up, but perfect for a project.
Prep Time – The Boring Part
Alright, got the shoes. Now the actual work began. You gotta prep them right, or the paint just won’t stick. Found some guides online, seemed straightforward enough.
- Grabbed some acetone – nail polish remover stuff works too, apparently.
- Got some cotton pads and started rubbing off the factory finish. Man, this part took longer than I thought and kinda stinks. Gotta do it outside or with windows open.
- Once they looked dull, I taped them up. This was tricky. Used painter’s tape to cover all the parts I didn’t want painted yet, or the bits I wanted to keep white, like the sole and the swoosh initially. Took ages to get the lines clean.
Painting – Where the Magic (Hopefully) Happens
I’d ordered some special leather paints online – went with a nice royal blue and a kind of forest green. Plus some brushes, nothing fancy.
Started with the blue. Put on a thin layer. Looked kinda streaky and bad. Panicked a little, not gonna lie. But people say thin coats are key. So I let it dry completely, which felt like forever. Then added another thin coat. Okay, looking better. Did maybe three or four coats of blue on the sections I wanted blue, letting each one dry in between. Patience is really important here, and I’m not always the most patient guy.
Then the green. Carefully removed some tape and taped off the blue parts I’d just finished. Started applying the green, same process – thin coats, letting it dry. Had a little bit of bleed under the tape in one spot, which was annoying. Tried to fix it carefully with a tiny brush and some white paint later.
Finishing Up
After all the colors were done and dry – really dry, like I left them overnight – I peeled off all the tape. That’s the satisfying part. Seeing the color blocks come together.
Cleaned up any little smudges or mistakes as best I could. The small bleed spot was still kinda visible if you looked close, but whatever, adds character, right? Last step was spraying on a matte finisher I bought. Supposed to protect the paint from scuffs and water. Did a couple of light coats of that, let it dry.
The Result?
And… done. Honestly? They looked pretty cool! Definitely unique. The blue and green combo was just like I pictured. Not factory perfect, you can tell they’re hand-painted if you inspect them super closely, but I kinda like that. They feel more mine. Wore them out the next day, felt pretty good. Definitely a fun project, learned a bit. Might even try another pair sometime.
