
Okay, let’s talk about this Prada bow thing. Not the actual brand stuff, you know, but getting that look. That really specific, neat, kinda structured bow you sometimes see. I saw it somewhere, maybe on a bag or a gift box in a picture, and thought, “I want to be able to do that.” Looked simple enough, right?
Wrong. Man, was I wrong. I grabbed some nice satin ribbon I had lying around, thinking this would be a five-minute job. My first few attempts? Floppy messes. Seriously, they looked like something a cat coughed up. One loop would be massive, the other tiny. Or the knot in the middle would be bulky and just… ugly. It wasn’t sharp. It wasn’t clean. It definitely wasn’t that ‘Prada’ vibe I was going for.
I spent a good chunk of an afternoon getting slightly annoyed. Fiddling with the ribbon, trying different tensions, different ways of crossing the loops. Nothing clicked. It just wouldn’t hold that crisp shape. I almost gave up, figuring it needed some special, super-stiff ribbon or maybe some hidden wire I didn’t know about.
Figuring It Out
So, I stepped back. Put the ribbon down. Had a cup of tea. I started thinking about the structure. What made that bow look different? It seemed flatter, somehow, and the knot was really minimal.
I went back to basics. Instead of making two loops and tying them, I tried a different approach I kinda pieced together from memory and just pure trial-and-error. Here’s roughly what I ended up doing after a lot of practice:
- First, the loop size. I realized I needed to decide on the final size of the loops before starting the knot. Not just eyeball it.
- Make the first loop. I held the ribbon flat and made one loop, pinching it at the base where the knot would be.
- Make the second loop. Then, folding the ribbon back on itself, I made the second loop on the other side, again pinching it tightly at the center base with the first loop. So now I had two loops pointing outwards, held together at the middle.
- The ‘knot’ part. This was the trick, I think. Instead of taking one end and looping it around everything, I took the longer tail of the ribbon, brought it around the pinched center from back to front, and then tucked it through the small loop formed at the back.
- Tightening carefully. The key was pulling this tight slowly and evenly, making sure the loops stayed the size I wanted and the ‘knot’ part cinched down really flat and small, right in the middle. I had to wiggle the loops a bit as I tightened to keep them symmetrical.
The material mattered too, a bit. A slightly stiffer ribbon, like a grosgrain or a really good quality satin, definitely helped it hold that shape better than the super soft, flimsy stuff. But the technique was the main thing.
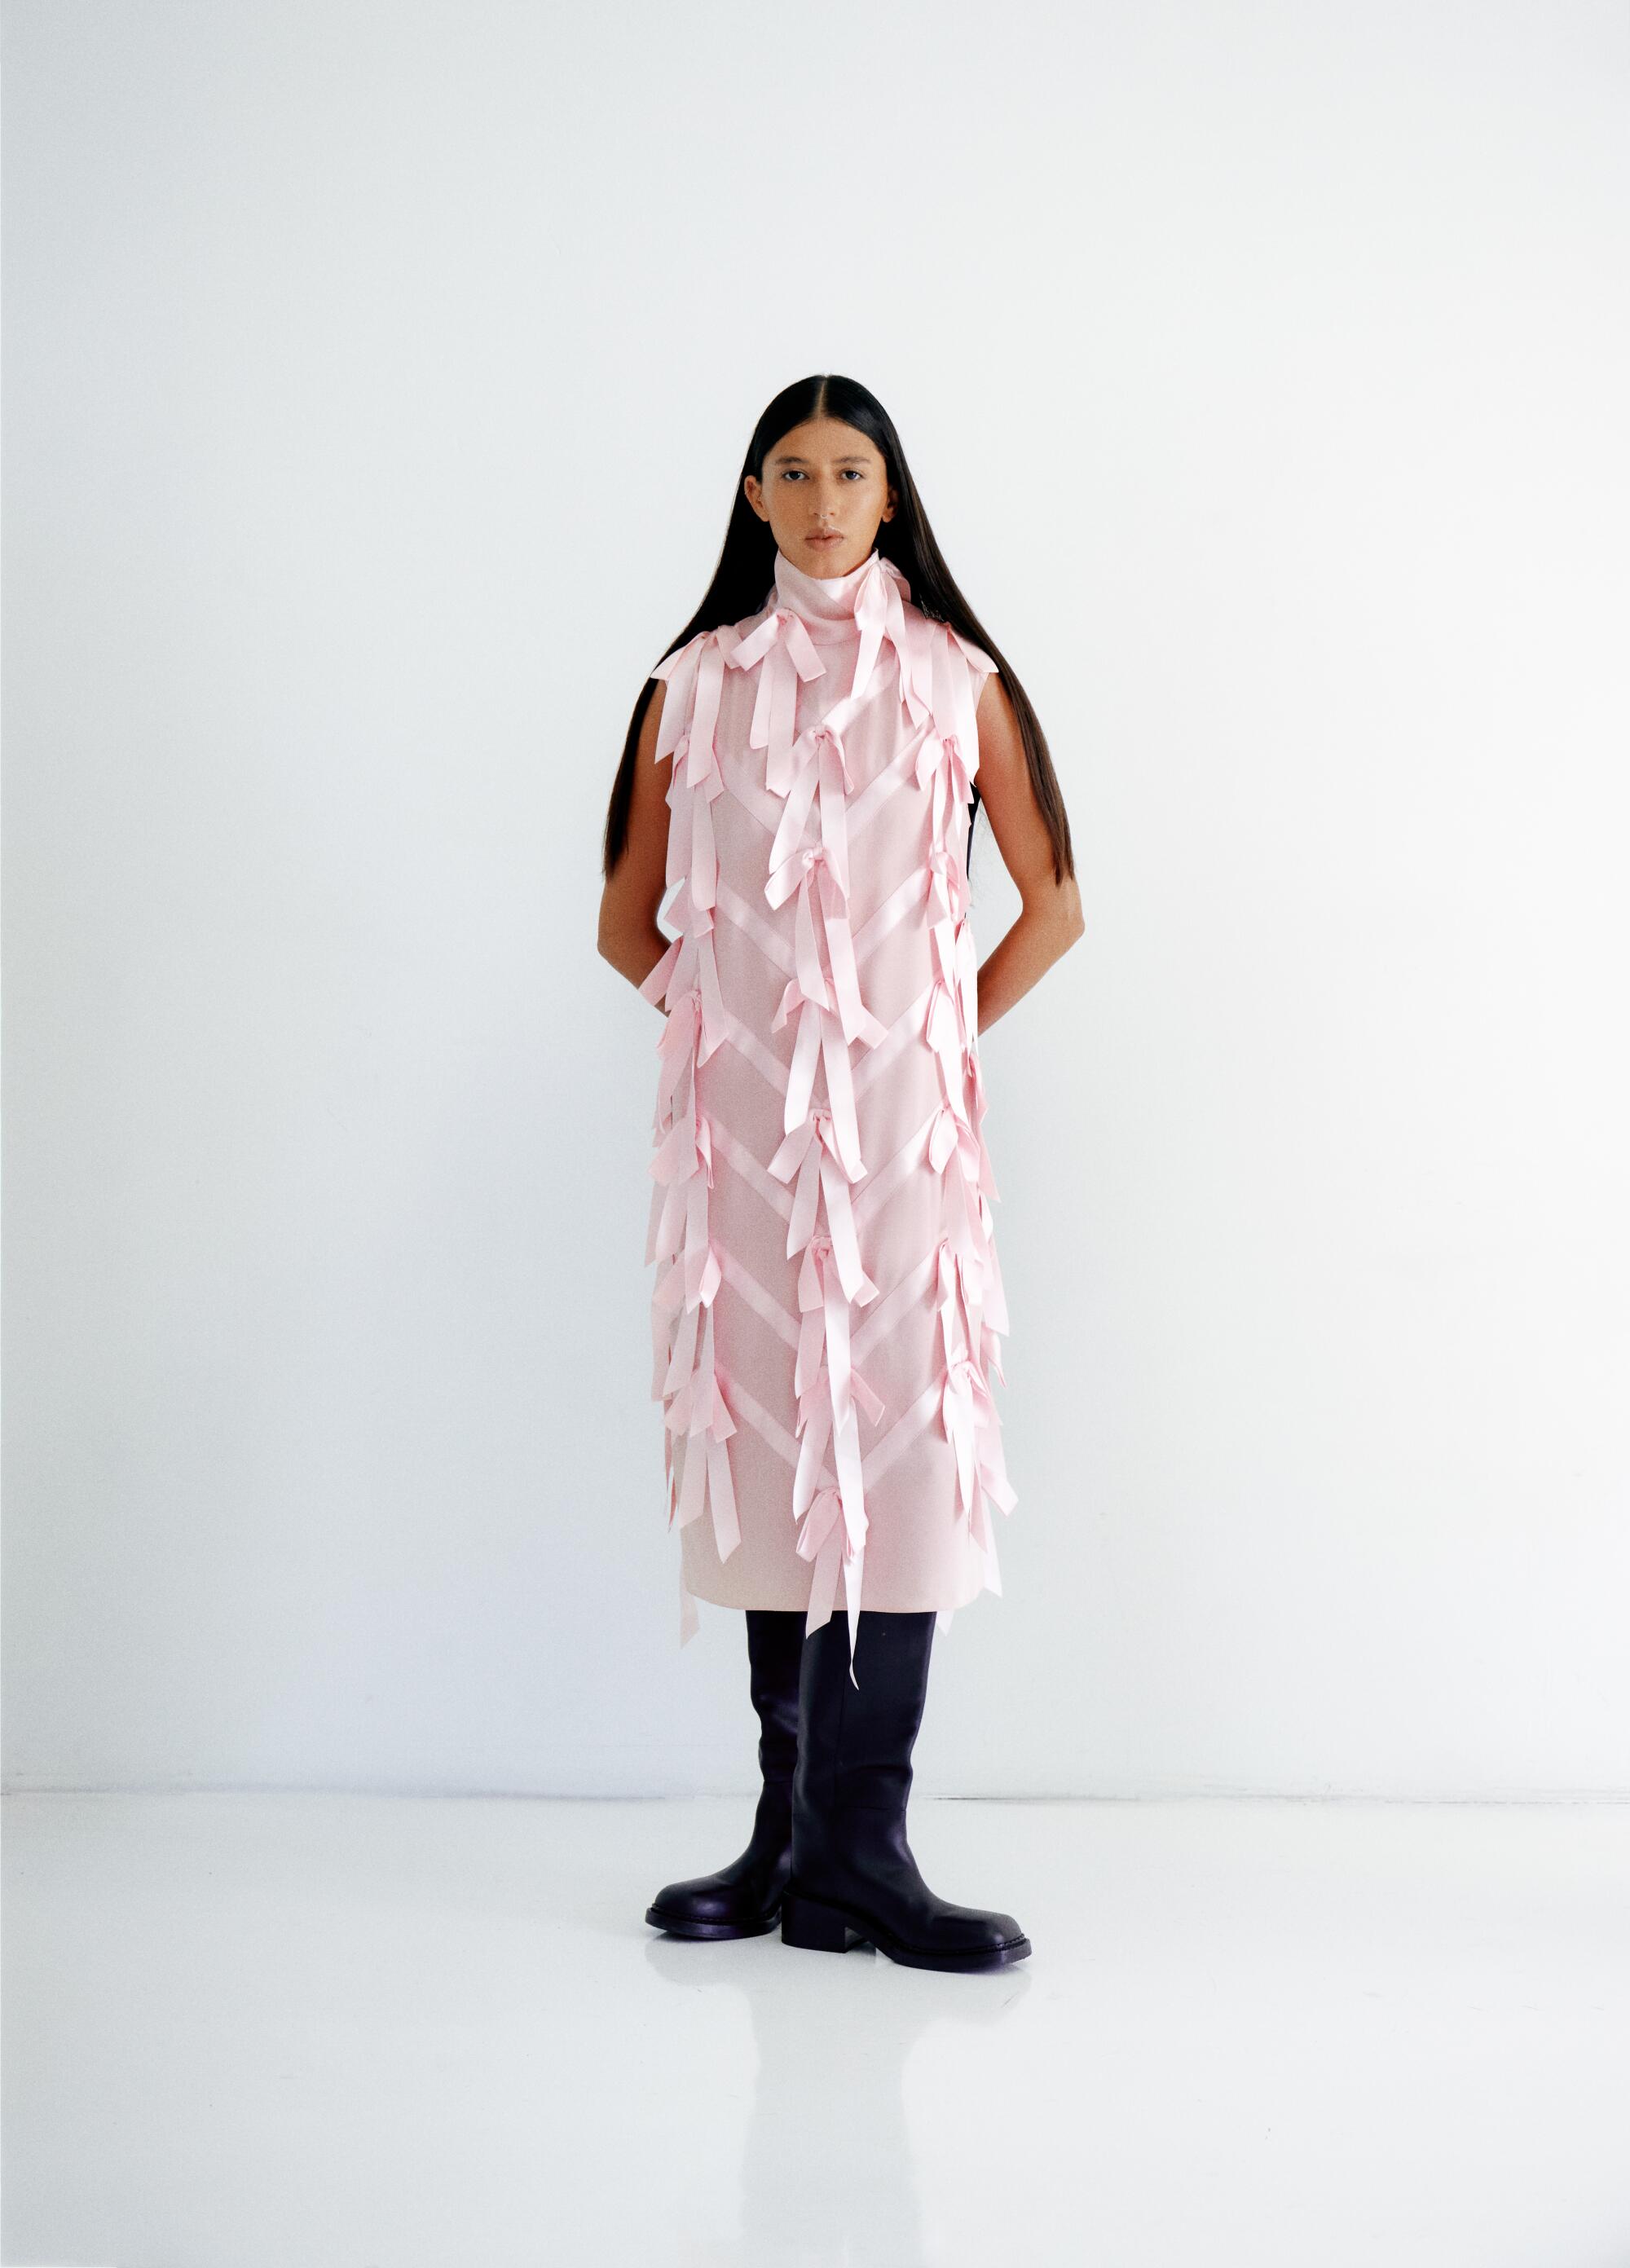
Finally, after maybe the tenth try with this new method, I got one. It looked… right! Crisp loops, flat little knot, symmetrical. It had that specific, almost architectural look. It wasn’t floppy; it sat nicely. Felt like a small victory, honestly.
So yeah, that was my little adventure trying to replicate that bow style. Took more patience than I expected, but got there in the end. It’s all about how you form the loops first and how you create that central knot. Give it a go if you’re ever trying to make something look extra sharp.
