")
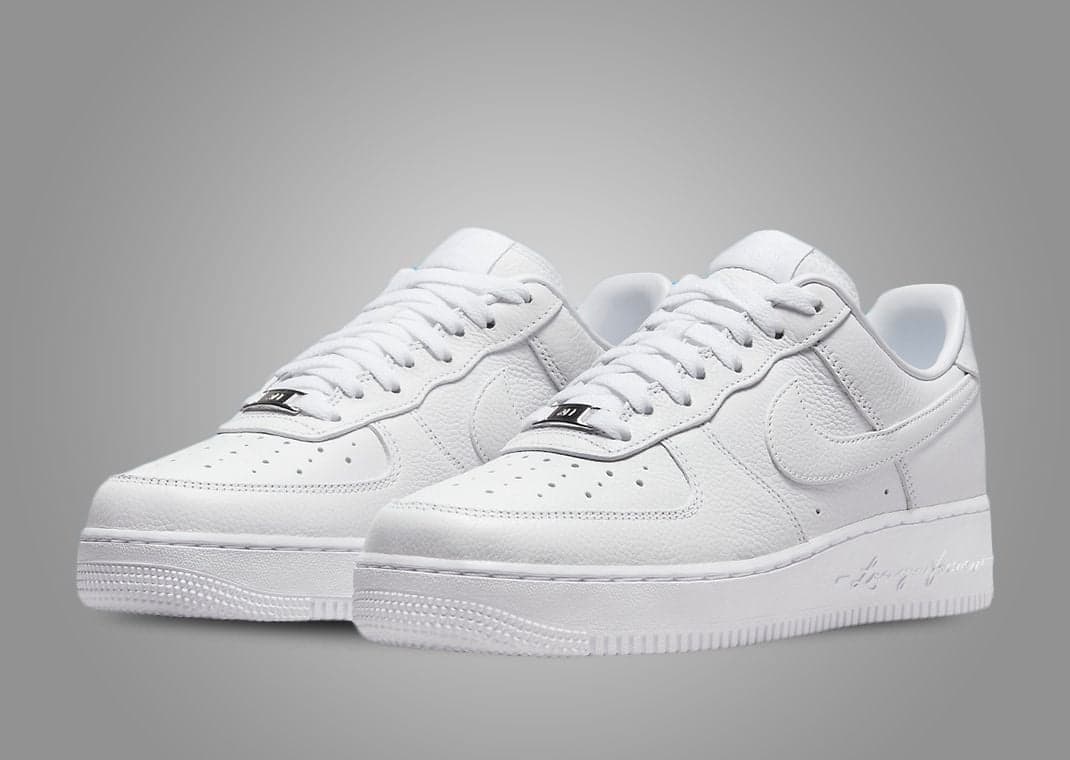
Yo, sneakerheads! It’s your boy, back at it again with another project. Today, we’re diving deep into the world of the Drake x Nike Air Force 1. I’ve been hyped about these kicks since they dropped, and I finally got my hands on a pair to customize.
Getting Started
First things first, I unboxed these beauties. The all-white leather is so crisp, it almost hurt to think about messing with them. But hey, that’s the whole point, right? Gotta make ’em my own.
Next, I gathered my supplies. I’m talking:
- Angelus leather paint (various colors, of course)
- Paintbrushes (different sizes for details)
- Masking tape (gotta keep those lines clean)
- A pencil (for sketching out the design)
- Leather preparer and finisher (for a professional look)
The Design Process
Okay, so I didn’t want to go too crazy. I love the clean look of the AF1s, but I needed a touch of something unique. I decided on a simple color-blocking scheme, adding some pastel blue and pink accents to the swoosh and heel tab. Simple, but effective. I lightly sketched out the areas I wanted to paint with a pencil. Nothing too permanent, just a guide.
Painting Time
Now for the fun part. I carefully applied masking tape to the edges of the areas I wanted to paint, making sure to press it down firmly to prevent any bleeding. Then, I mixed my paints to get the perfect shades of baby blue and soft pink. It took a few tries, but I got there.
Using a thin brush, I started painting the swoosh and heel tab. I applied thin, even coats, letting each layer dry completely before adding another. Patience is key here, people! Don’t rush it, or you’ll end up with a clumpy mess. I probably did about three coats for each color to get a solid, opaque finish.
Finishing Touches
Once the paint was completely dry (I waited a full 24 hours, just to be safe), I carefully removed the masking tape. Boom! Clean lines, baby! Then, I applied a coat of leather finisher to seal the paint and protect it from scratches. This also gave it a nice, slightly glossy finish, just like the original shoe.
And that is all. I hope this blog is helpful.
