
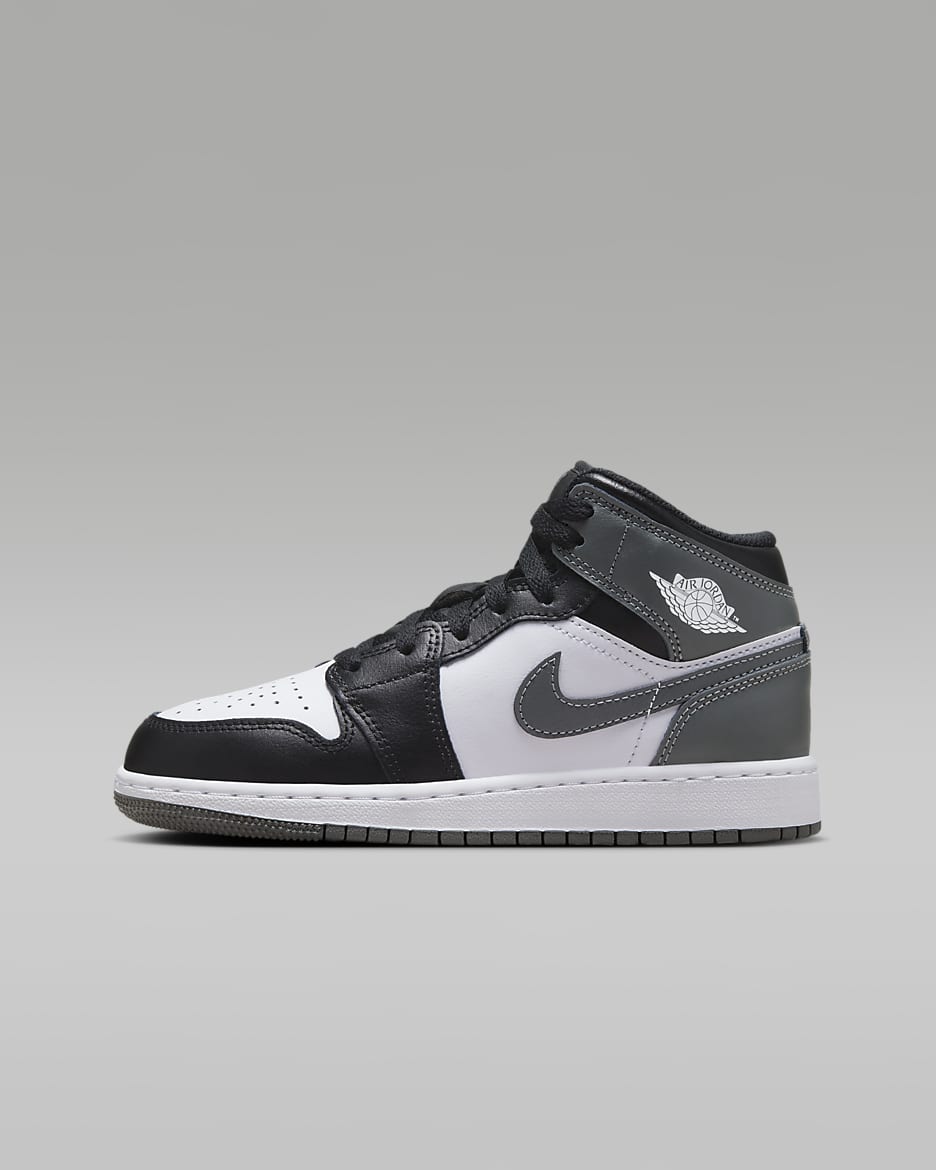
Okay, so I’ve been wanting to customize my Jordan 1 Mids for a while now. I finally decided to go for it and picked up a pair of the “Grey Black” colorway. I’m not a pro painter or anything, but I figured, how hard could it be? Famous last words, right?
Getting Started
First things first, I gathered my supplies. I already watched a bunch of YouTube videos, so I knew I needed:
- Angelus leather paint (I went with grey and black, obviously)
- Some fine-tipped paint brushes
- Masking tape (the blue painter’s tape)
- A deglazer (Angelus makes one, so I grabbed that)
- A matte finisher (again, Angelus)
- Some cotton balls and Q-tips
I cleaned the shoes really well. I just used some soapy water and a soft cloth, making sure to get all the dirt and grime off. Then, the scary part – the deglazer. This stuff basically strips the factory finish off the leather so the paint will stick better. I just soaked a cotton ball in the deglazer and rubbed it all over the areas I planned to paint. The shoes looked a little dull afterward, but that’s what’s supposed to happen.
Taping and Painting
Next up, taping. This took FOREVER. I wanted really clean lines, so I spent a good hour just carefully taping off the sections I didn’t want to paint. I used small pieces of tape and really pressed down the edges to make sure no paint would sneak underneath.
Finally, time to paint! I started with the grey, since it was the lighter color. The key here is thin coats. I did like three or four super thin coats of grey, letting each coat dry completely before doing the next. It looked a little streaky at first, but it evened out with more coats.
Once the grey was totally dry, I carefully removed the tape and then taped off the areas I wanted to paint black. Same process – thin coats, lots of drying time. I probably did four coats of black, too.
Finishing Touches
After all the painting was done and completely dry (I waited like a full 24 hours to be safe), I applied the matte finisher. This helps protect the paint and gives it a nice, even finish. I just brushed on a thin coat and let it dry.
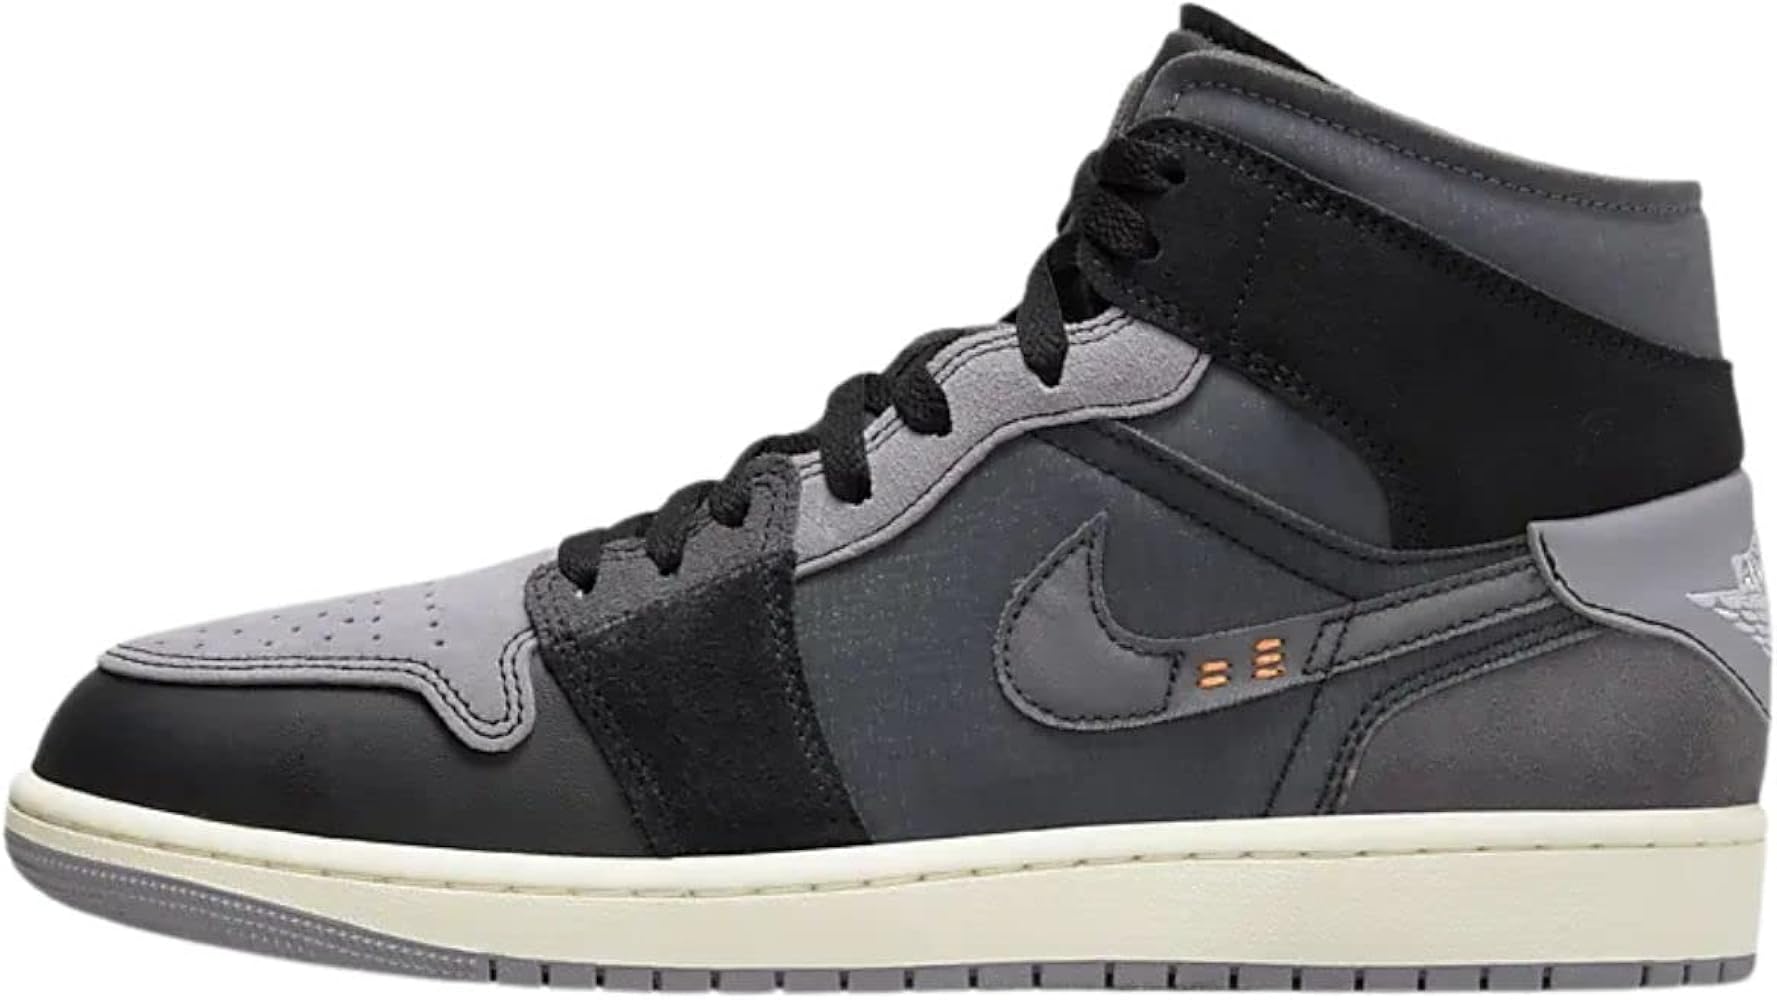
And that’s it! Honestly, it took way longer than I expected, but I’m pretty happy with how they turned out. They’re not perfect, but they’re definitely unique. It was a fun project, and now I’m thinking about what other shoes I can customize…
