
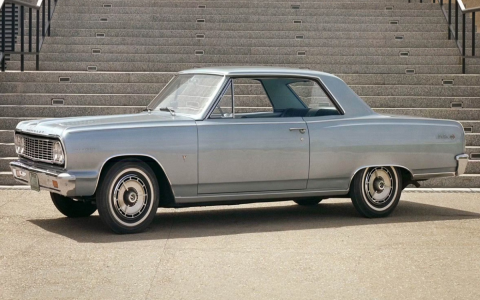
Alright, let me walk you through what I’ve been up to with this ’64 Chevelle Malibu SS. It’s been a bit of a journey, but totally worth it.


Getting Started
So, I managed to get my hands on this ’64 SS. It wasn’t exactly pristine, you know? Looked like it had been sitting for a while. The potential was definitely there, though. You could just see the lines under the dust and faded paint. First thing was just getting it back to my garage where I could really dig in.
Once it was there, I spent a good day just looking it over. Checked the frame for any serious rust – luckily, it was mostly surface stuff and pretty solid overall. The floors needed some attention, typical for these cars. The engine, supposedly the original small block, was there, but definitely needed waking up.
The Teardown and Engine Work
I decided to start with the mechanicals. Gotta make sure it runs and stops before making it pretty, right? So, I pulled the engine and transmission out. It just makes everything easier to access.
- Cleaned the engine bay like crazy. Years of grease and grime.
- Took a good look at the engine itself. Decided on a basic rebuild – nothing too wild, just wanted reliability. New gaskets, seals, checked the cylinders, new timing chain.
- The carburetor needed a full rebuild. Took that apart piece by piece, cleaned it all, put it back with a kit.
- Went through the ignition system – new plugs, wires, cap, rotor. Points system for now, keeping it classic.
- Checked the transmission, seemed okay but changed the fluid and filter just to be safe.
Getting the engine back in was a careful process. Lined it all up, bolted it down, connected everything back – fuel lines, exhaust, wiring. That first startup after the work? Always a great moment when it fires up.
Body and Interior Bits
With the engine sorted, I turned my eyes to the body. Like I said, some floor pan rust. So, I cut out the bad sections. This part takes patience. Measured twice, cut once, you know the drill. Welded in new patch panels. Ground the welds smooth. It’s not perfect show car stuff, but solid and sealed now.

I didn’t go for a full repaint yet. Decided to clean up the existing paint as much as possible. Lots of buffing and polishing brought back some shine. Addressed the surface rust spots I found. The chrome trim needed a ton of polishing too, but it cleaned up surprisingly well.
Inside, the seats were actually not too bad, just needed a deep clean. The carpet was shot, so I pulled that out and put in a new set. The dash needed some love – cleaned up the gauges, made sure the lights worked. Found a replacement piece for some cracked trim on eBay. It’s the little things that make a difference.
Final Touches (For Now)
Put the wheels back on – gave the original SS hubcaps a good polish first. Connected the battery, double-checked fluids. Took it for a slow drive around the block. Felt good. Still needs fine-tuning, maybe some suspension work down the line, and definitely a proper paint job eventually. But for now? It runs, it drives, and it looks a heck of a lot better than when I started. It’s a proper driver, and that’s what I was aiming for with this stage of the project. Sharing the process is almost as fun as doing it!