
Getting Started with My Custom AF1s
So, I had this pair of plain white Air Force 1s sitting around. You know the ones, classic, but maybe a bit boring after a while. I kept seeing all these custom sneakers online and thought, why not give it a shot myself? Decided on a color scheme I really dig: red, white, and black. Strong colors, look good together, can’t really go wrong, right?
Prep Work is Key
First thing first, gotta get the shoes ready. They weren’t brand new, so I gave them a good clean. Just soap and water, nothing fancy. Then the important part: prepping the leather. I grabbed some acetone – the regular nail polish remover kind works, but I used something a bit stronger meant for leather prep. Wiped down all the areas I planned to paint. This step sucks, honestly, smells strong and you gotta be careful, but it strips off the factory finish so the paint actually sticks. If you skip this, the paint will just peel off later. Learned that the hard way on a different project once.
Next up, supplies. I needed:
- Leather paint (Angelus brand is what most folks use, so I got that in black and red)
- Paint brushes (a few different sizes, some fine-tip ones for details)
- Masking tape (the blue painter’s tape is decent)
- A finisher (to seal the paint job)
- Patience. Lots of it.
Laying Down the Colors
Okay, taping time. This took ages. I wanted really clean lines. Decided to make the main swoosh black, the heel tab black, and add some black details on the midsole stitching area. The area around the laces and the toe box overlay would get the red treatment. Taping off those curves on the AF1 is tricky, gotta press the tape down really well, especially at the edges, or the paint bleeds underneath.
Started with the black paint. Applied thin coats. Seriously, thin coats are crucial. If you glob it on thick, it looks bad and cracks easily. I did maybe 3 thin coats of black, waiting for each one to dry properly in between. Used a hairdryer on a low setting sometimes to speed it up a bit, but mostly just let air drying do its thing.
Once the black was totally dry (waited a good few hours, maybe even overnight, can’t remember exactly), I moved on to the red. Taped off the black areas carefully to protect them. Same process: thin coats. Red sometimes needs more coats than black to look vibrant, so I think I ended up doing 4 coats of red. Again, waiting for it to dry between each layer.

There were a couple of spots where the paint bled under the tape slightly. Annoying. I used a fine brush and some white paint (luckily the base shoe was white) to carefully touch up those edges. Also touched up tiny bits of black or red where needed.
Finishing Touches
After all the paint was dry – like, really dry, left them for a full day just to be sure – it was time for the finisher. This protects the paint from scuffs and water. I used a matte finisher because I didn’t want them too shiny. Sprayed it on evenly, let it dry. Did a second coat of finisher just to be safe.
Pulled off all the tape carefully. That’s the satisfying part, seeing those clean lines (mostly). Changed the laces to black ones too, just felt right with the color scheme.
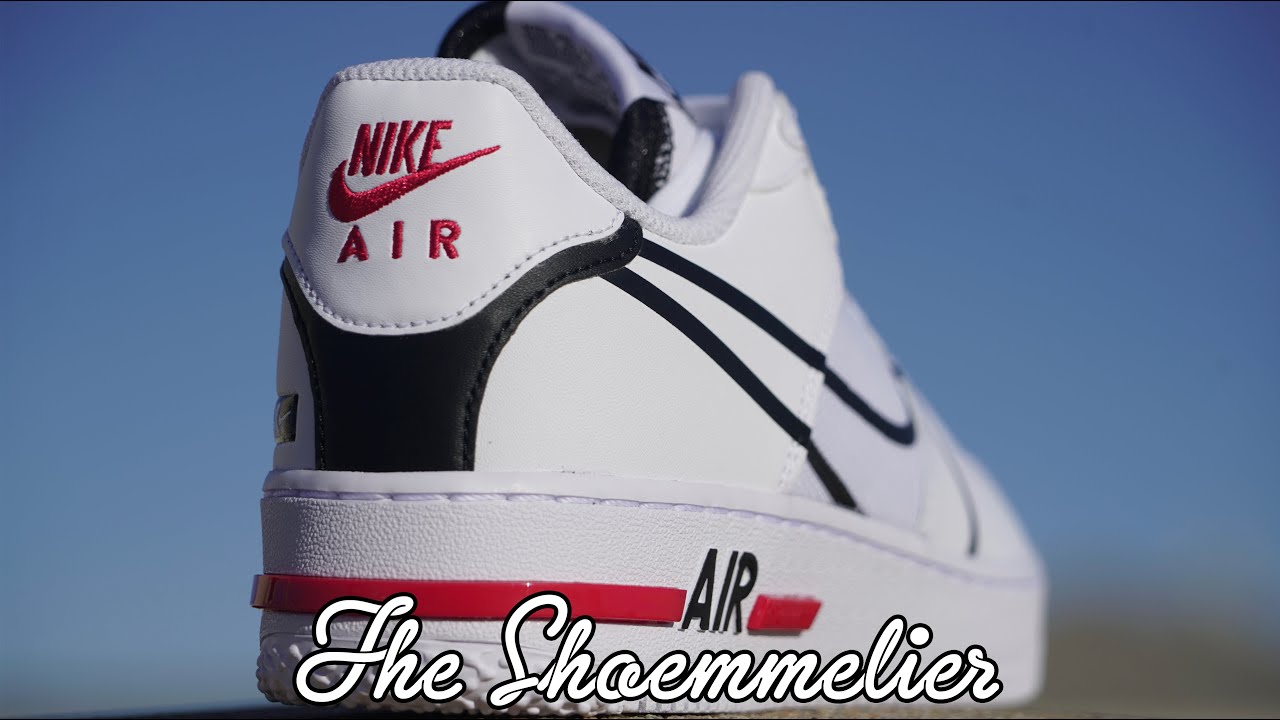
The Final Look
And that was pretty much it. Stepped back and looked at them. Yeah, pretty pleased with how they turned out. The red, white, and black just pops. They’re definitely unique now, nobody else has this exact pair. It took time, and it wasn’t perfect, there are tiny flaws if you look super close, but doing it yourself is pretty rewarding. Way cheaper than buying pre-customized ones too. Definitely gonna rock these a lot.
