
Okay, so here’s what went down the other day. I was staring at my hands and just felt like I needed a little pick-me-up, something bright and happy. Pink immediately came to mind, ’cause, well, it’s classic, right? So, I decided to dive into some pink manicure ideas myself.


My Quest for the Perfect Pink
First things first, I had to actually decide on what kind of pink I was going for. I scrolled through a bunch of images, saw all sorts of things – super bright neons, pale baby pinks, glitters, all that jazz. But I was leaning towards something a bit more… me. Something soft, but not boring.
I remembered I had this lovely dusty rose polish I hadn’t used in ages. So, I went on a little treasure hunt through my polish collection. Found it! And a couple of other contenders, just in case.
Getting Down to Business: The Process
Alright, so with my chosen pink in hand, I started the actual process. Here’s pretty much how I did it:
- Prepped my nails. This is the boring but super important part. I filed them into a nice shape, nothing too crazy, just a soft round edge. Then I pushed back my cuticles – gently, of course. And finally, I buffed the surface a little to make sure the polish would stick.
- Next up, base coat! I never skip this. I applied a thin layer to protect my nails and give the color something to grip onto. Waited for that to dry properly. Patience is key, I keep telling myself.
- Then came the star of the show: the pink polish. I opened the bottle and wiped off the excess from the brush. The first coat, I painted it on carefully, trying to get as close to the cuticle as possible without flooding it. It looked a bit streaky, which is totally normal for the first coat, so I didn’t panic.
- I let that first coat dry for a good few minutes. Seriously, give it time. Then I went in with the second coat. Ah, much better! This coat really brought out the true color and evened everything out.
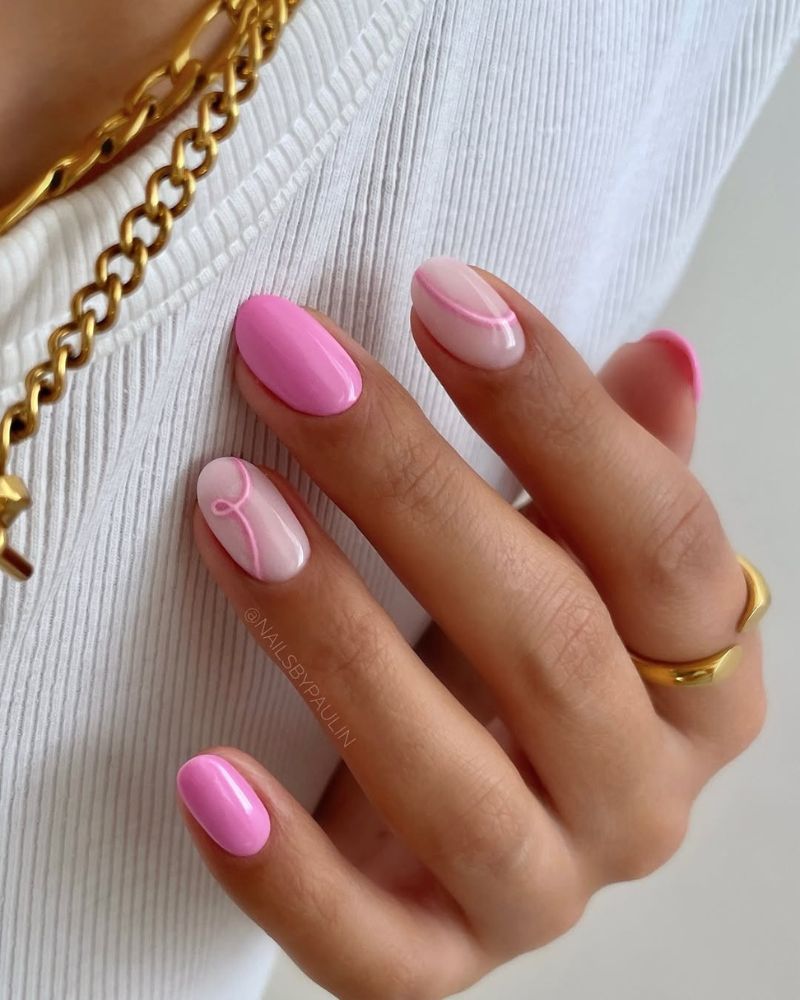
- I was pretty happy with just the solid pink, it looked so clean and fresh. But then I thought, why not a little something extra? I had this very fine, subtle shimmer top coat. Not chunky glitter, just a hint of sparkle. I decided to add a thin layer of that on top of the pink. It just gave it a little bit of dimension, you know?
- And finally, the grand finale: a good, glossy top coat. I sealed everything in with a generous layer. This step is crucial for making it last and giving it that super shiny, professional look. I also made sure to cap the free edge of my nails to prevent chipping.
The Result and My Thoughts
So, after all that, I stepped back and admired my work. And you know what? I was really pleased! My nails looked so pretty and put-together. The dusty rose was just the right shade of pink – not too loud, not too invisible. The subtle shimmer was a nice touch too, catching the light just so.
Honestly, just taking that bit of time to do my nails, to focus on something small and creative, really lifted my spirits. It’s amazing how a little bit of color and self-care can make you feel better. It wasn’t some revolutionary design, just a simple pink manicure, but it worked for me!

So yeah, that was my little pink manicure adventure. Sometimes the simplest ideas are the best ones. Definitely gonna rock this look for a while.