Getting Started with Bow Nails
So, I had this idea floating around in my head – wanted something a bit cute on my nails, you know? Decided bows were the way to go. Didn’t really have a solid plan, just kind of went for it.

Prepping Everything
First things first, I gathered all my stuff. Dug out my nail kit. Found a base coat, a nice sheer pink polish I like, and a clear top coat. Crucially, I had these tiny little 3D bow charms I bought a while back and never used. Perfect timing, right?
Then, the usual prep work. Cleaned up my nails, filed them into a shape I liked, nothing fancy. Pushed back the cuticles a bit. Just wanted a clean slate to work on.
Putting on the Polish
Alright, step one: base coat. Always gotta do the base coat, helps things stick better, I think. Let that dry for a minute or two. Then I grabbed that pink polish. Applied one coat, let it dry mostly, then went in for a second coat to make the color pop a bit more. Waiting for polish to dry is always the most boring part, seriously. I just tried to sit still and not smudge anything.
The Main Event: Adding the Bows
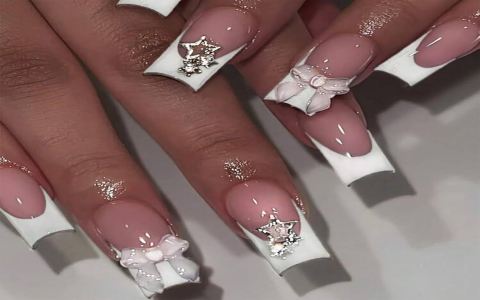
Okay, here’s where the bows come in. Once the second coat of pink was still just a tiny bit tacky – not wet, but not rock hard – I decided that was the time. I picked out a couple of those little white bow charms.
- Figured out where I wanted them. Decided just on the ring finger of each hand, kind of like an accent nail.
- Put a tiny dab of nail glue right where the bow would sit. Some folks use top coat, but I had glue, so I used that.
- Carefully, using tweezers because my fingers are too clumsy, I picked up a bow charm and gently pressed it onto the glue spot. Held it there for a few seconds to make sure it stuck. Did the same on the other hand.
It was a bit fiddly, not gonna lie. Almost dropped one of the bows. But got there in the end.

Finishing Up
Once the bows felt secure, I waited a bit longer just to be safe. Then I grabbed my top coat. This part needed care. I applied the top coat over the whole nail, going around the base of the bow charm carefully to help seal it in without covering the charm itself too much. Didn’t want to lose the 3D effect, you see.
Let everything dry completely. Like, really dry. Went back with a cotton swab dipped in remover to clean up any polish that got on my skin around the edges. Makes it look neater.
The Final Look
And that was pretty much it! Stood back and looked at them. Yeah, pretty happy with how they turned out. Simple pink nails with a cute little bow on one finger. Nothing groundbreaking, but it was fun to do, and they looked nice. Definitely something I’d try again when I want a little extra something.


