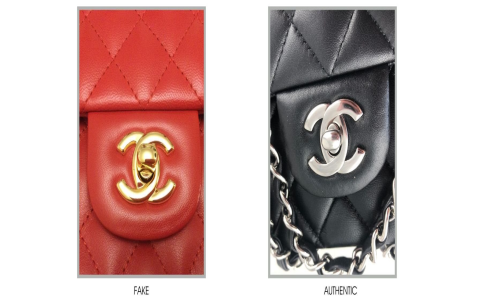
Okay, let me tell you about this handbag project I tackled recently. It all started when I saw this style I really liked, you know, the one with that classic interlocking logo. Couldn’t get it out of my head, but the price tags? Forget about it. So, I thought, why not try making one myself? Seemed like a fun challenge.

Getting the Bits Together
First off, I had to gather everything. This was tougher than I expected.
- Material: I went for some decent quality faux leather I found online. Felt nice and sturdy.
- Lining: Just some simple black fabric I had lying around from another project.
- Hardware: This was the tricky part. Finding the right clasp, that double C thingy, took ages. Scoured so many craft stores and online marketplaces. Finally found one that looked close enough. Also needed some D-rings and chain for the strap.
- Thread and Needles: Standard stuff, but I got some heavy-duty needles just in case the faux leather was tough.
Honestly, sourcing that logo clasp almost made me give up. Felt like I spent more time clicking through pages than I would actually sewing the thing.
Putting it All Together
Alright, so with all my bits laid out, I started the actual work. I sketched out a simple pattern based on bags I liked. Nothing too fancy, just a basic rectangular body with a flap.
Cutting the faux leather was the first step. Needed sharp scissors and a steady hand. Measured twice, cut once, you know the drill. Did the same for the lining fabric. Then came the sewing machine. My old machine sometimes acts up, so I was kinda holding my breath. Started stitching the main body pieces together, right sides facing each other. Had to go slow, especially around the corners, to keep the stitches neat. The faux leather was a bit thick, but the heavy-duty needle managed okay, mostly.
Next up was the lining. Sewed that together separately, leaving an opening at the bottom like you usually do. Then, the slightly mind-bending part: putting the outer bag inside the lining bag, right sides together, and sewing around the top edge. This always feels weird until you turn it right-side out through that gap you left in the lining.

The Fiddly Bits and Finishing Up
Once the main bag shape was done and turned out, I stitched up the opening in the lining. Now for the hardware. Attaching the D-rings for the strap involved making little tabs from the faux leather, folding them over the rings, and stitching them securely to the sides of the bag. That took some careful maneuvering under the machine’s needle.
The flap needed structure, so I added a bit of interfacing inside before sewing it. Attaching the flap to the back of the bag body was straightforward enough. But then came the clasp. Getting that logo piece centered on the flap and the bottom part aligned on the bag body? Man, that was nerve-wracking. I must have measured and marked it five times before actually making the cuts and fixing it in place. Used some special glue recommended for fabric and metal, plus the little prongs that came with the clasp. Really didn’t want it falling off after all this work.
Last step was adding the chain strap to the D-rings. Clipped it on, and boom. Done.
It’s definitely not perfect if you look super close. Some stitches might be a bit wobbly. But honestly? I made it. From cutting the pieces to wrestling with that clasp, it was quite the process. Feels pretty good carrying something you put together yourself, you know? Plus, it didn’t cost me an arm and a leg. Worth the effort, I’d say.


