
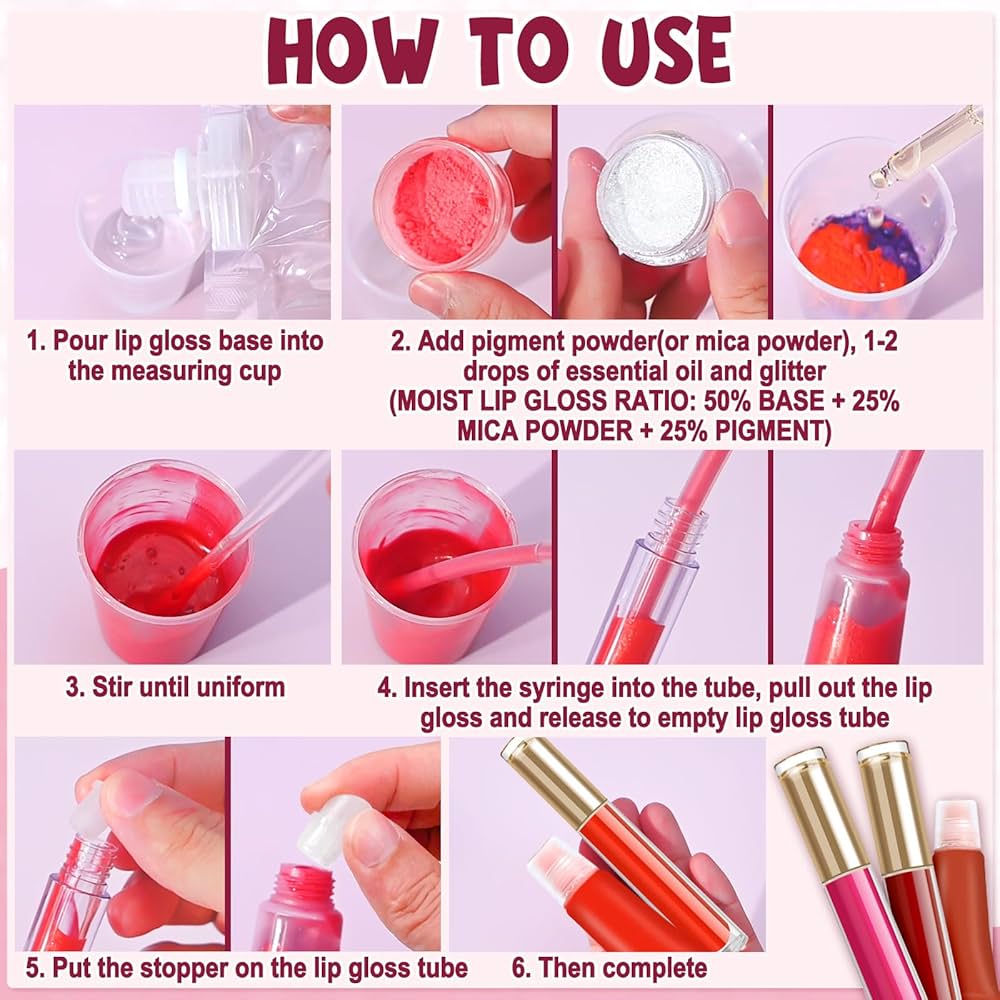
My Custom Gloss Adventure Starts Confused
Honestly, I kept seeing people talk about “custom gloss and style” online, especially for things like DIY projects or even phone cases, and I just didn’t get it. Like, isn’t gloss just… shine? And style is how it looks? Why make it custom? It bugged me. So yeah, I decided to finally figure out what the fuss was about by making my own. No more confusion.
Gathering My Stuff (Total Chaos)
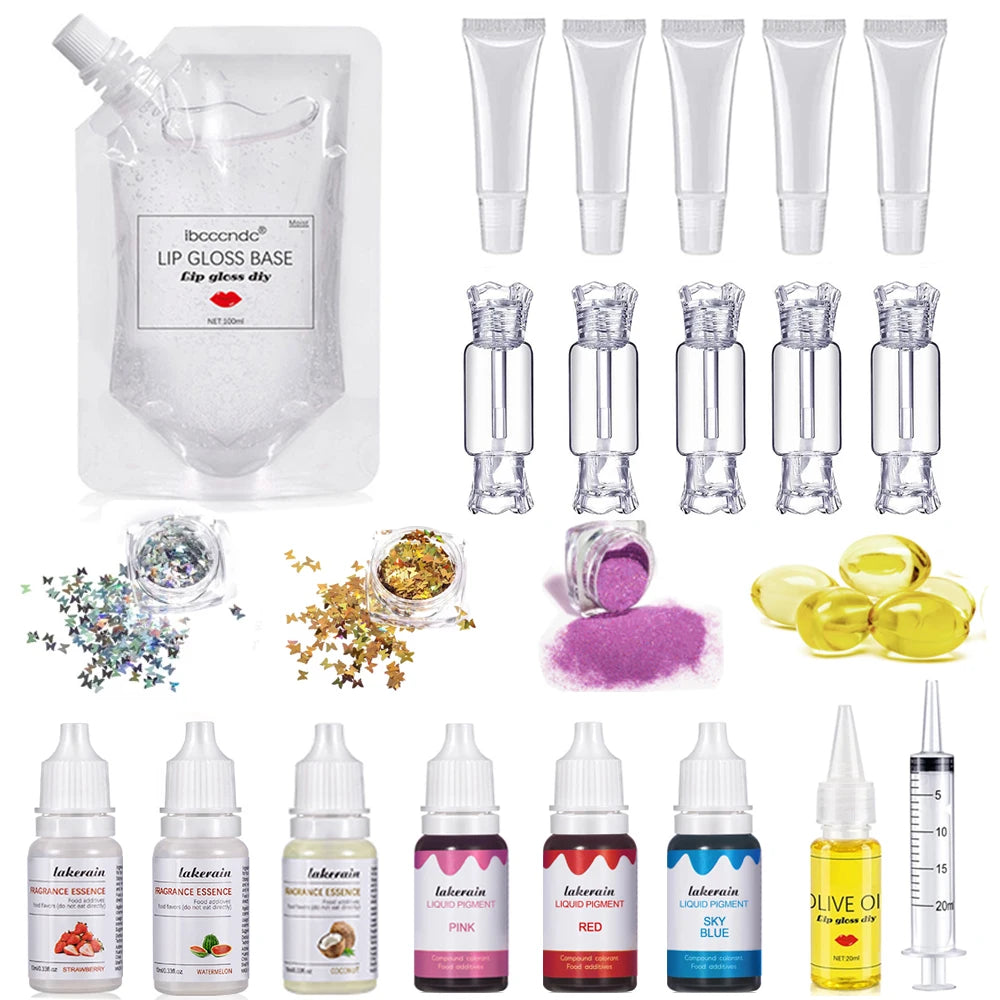
Okay, step one: figure out what I even need. It felt vague. I knew gloss involved some kind of shiny finish you put over something. Style seemed related to colors and how the final piece looks. I read a bunch of quick forum posts – mostly people arguing about ingredients! I ignored the fancy chemical names and just grabbed stuff I figured might work:
- Some clear glue I had leftover from the kids’ craft box.
- Nail polish top coat – super shiny, right?
- A tiny bottle of cheap clear varnish from the garage.
- My old watercolor paints for style – adding color!
- An old plastic phone case I didn’t care about ruining.
- Little cups for mixing (yogurt pots!).
- Paintbrushes, toothpicks for stirring.
Not exactly professional! But hey, the point was to try.
Mixing Like a Mad Scientist
First, I just tried the glue. Brushed it onto the back of the case. Felt sticky forever, dried kinda cloudy. Nope. Next, the nail polish top coat by itself. Went on smoother, dried fast, super shiny! But super thin. One scratch and it peeled right off. Not durable at all.
Then I mixed. Glue + nail polish? Thick gloop! Could barely spread it. Got bubbles everywhere. Tried varnish + a tiny drop of watercolor paint. The paint kinda separated and floated in the varnish. Looked weird. Added glue to that mixture? Worse! It became this lumpy mess. I think I made monster snot. Almost quit.
Persistence mode: Just mixed the clear varnish with the nail polish. Equal parts. Stirred forever with a toothpick. This looked… kinda promising? It was thicker than nail polish alone, smoother than glue. Brushed a thin layer on the case. Waited. And waited. Came back later – much better shine! Not cloudy. Seemed less sticky too.
Making it Mine – Adding “Style”
Okay, I had a decent clear gloss base (varnish + nail polish mix). Time for the custom style part! I wanted a soft blue tint. Scooped a little of my gloss mix into a clean yogurt pot. Dabbed a tiny bit of blue watercolor on a toothpick and swirled it into the gloss. Swirled carefully! Too much color and it goes murky. Tested it on scrap plastic first. Perfect! A very faint, translucent blue. Applied thin coats to my case. Let each one dry completely before adding more. Three coats later, it looked awesome! Smooth, deep shine, with this cool custom color underneath the gloss.
What Actually Worked (Simple Version)
After all that messing around, here’s what actually gave me a usable custom gloss and style:
- The Gloss: 50/50 mix of cheap clear varnish and clear nail polish top coat. Stir really well!
- Style (Color): Mix a TINY amount of pigment (watercolor paint worked, acrylics probably better) directly into a small batch of your gloss mix BEFORE applying. Go slow with color! Layer it.
- Applying: Clean your surface! Apply super thin layers. PATIENCE! Let each layer dry totally (like overnight) before adding more. Three thin coats beat one thick gloopy disaster.
- Protecting: My mix is definitely not industrial strength. It’s for fun! But for a custom case sitting on my desk? Good enough.
Turns out custom gloss and style just means controlling the shine AND the color/effect underneath yourself. Messy? Yes! Worth it for that unique piece? Totally. Didn’t need fancy stuff, just needed to experiment.
