
Alright folks, gather ’round! Today I’m spilling the tea on my November nails. It was a whole process, let me tell you.
First things first, I started by gathering my supplies. I’m talking nail polish (duh!), base coat, top coat, cuticle pusher, nail file, and my trusty nail lamp. You gotta be prepared, you know?
Then came the fun part (kinda): removing my old polish. I used a regular nail polish remover and cotton pads. Honestly, this part is always a little tedious, but you gotta do it right to get a clean slate.
Next up, I shaped my nails. I went for a rounded square shape this time. Filed ’em down, made sure they were all even-ish. Perfection isn’t the goal, people, just a decent shape!
Cuticle time! I pushed those babies back gently with the cuticle pusher. No need to go crazy here, just a little nudge to make the nail bed look nice and tidy.
Okay, now for the actual painting! I started with a base coat. Gotta protect those nails, right? One thin layer, and then I let it dry completely.
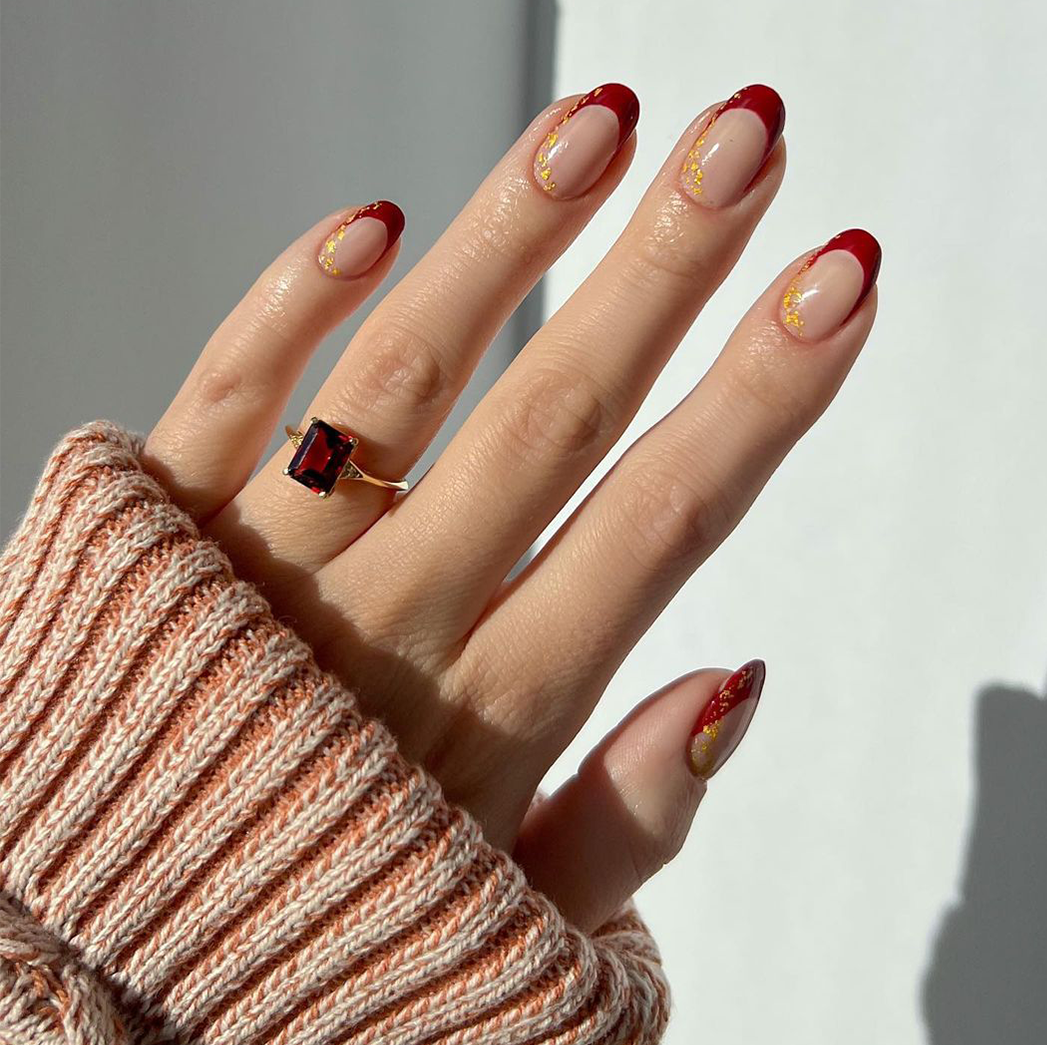
Then came the color! I chose a deep burgundy shade – perfect for November, if you ask me. Two coats, making sure to let each one dry before applying the next. Patience is key, people!
Here’s where the magic happens: I cured each coat under the nail lamp. Usually, it’s about 60 seconds per coat, but I always double-check the instructions on the polish bottle. Don’t want any sticky surprises!
Top coat time! This seals everything in and gives it that nice, glossy finish. Again, one thin layer and then cure under the lamp.
Almost there! I cleaned up any smudges or mistakes with a small brush dipped in nail polish remover. We all make ’em, no shame in the game.
Finally, I applied some cuticle oil to keep those nails and cuticles hydrated. And that’s it! November nails, complete!
- Prep is key! Don’t skip the base coat or cuticle care.
- Thin coats are your friend. Avoid thick, gloppy messes.
- Patience, patience, patience! Let each coat dry completely.
The Result?
I am pretty happy how they turned out. It took me about 2 hours from start to finish but, I love doing my own nails so I didn’t mind. It’s cheaper than going to a salon, and I get to choose exactly what I want. Plus, it’s kinda therapeutic, you know?
So, that’s my November nail journey. Hope you enjoyed it! Now go forth and conquer your own mani-pedi adventures!
